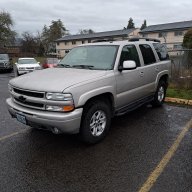
FW_Z71Burb's 2002 Suburban Z71

ORVietVet

Well-Known Member
Navy Supporting Member
Joined
Dec 31, 2023
Messages
2,761
Reaction score
5,062
Location
Oregon
I’m gonna throw the Dorman clamp kit on and send it for a few more years
The Dorman clamp kit is for if the very end bolt heads break off. That broken bolt head looks to be 1 bolt head from the end. If the end bolt head is still there, I am not sure whether the clamp kit can even be installed. Or I am not seeing correctly in the pics.
 

FW_Z71Burb

Well-Known Member
Joined
Oct 14, 2025
Messages
219
Reaction score
637
Location
Fort Worth, TX
The Dorman clamp kit is for if the very end bolt heads break off. That broken bolt head looks to be 1 bolt head from the end. If the end bolt head is still there, I am not sure whether the clamp kit can even be installed. Or I am not seeing correctly in the pics.
It looks like the clamp kit for the end (rear of engine) uses an available hole on the exhaust manifold to head to have a large bolt tightened against it, plus two more holes on the back of the head to torque the whole bracket down

IMG_0338.jpeg
 

ORVietVet

Well-Known Member
Navy Supporting Member
Joined
Dec 31, 2023
Messages
2,761
Reaction score
5,062
Location
Oregon
The part number for the end clamps are the same number for the d/s rear and p/s front. The d/s front and p/s rear are the same.

I agree that the best way to do the d/s rear is to unbolt the front of the front driveshaft and let it flop out of the way. Also, remove the heat shield at the d/s firewall.
 

FW_Z71Burb

Well-Known Member
Joined
Oct 14, 2025
Messages
219
Reaction score
637
Location
Fort Worth, TX
The part number for the end clamps are the same number for the d/s rear and p/s front. The d/s front and p/s rear are the same.

I agree that the best way to do the d/s rear is to unbolt the front of the front driveshaft and let it flop out of the way. Also, remove the heat shield at the d/s firewall.
Thanks OR!
Another comment was they removed the d/s wheel and inner fender liner and hit it from there
 

ORVietVet

Well-Known Member
Navy Supporting Member
Joined
Dec 31, 2023
Messages
2,761
Reaction score
5,062
Location
Oregon
I cannot remember for sure but IIRC, when you lift the d/s rear clamp body up to start one of the two rear bolts that attach the clamp at the back of head, I had both bolts shoved thru the unthreaded holes and started the top most bolt because the room to just start one and then try to snake the other bolt into the other hole, was so tight that it was near impossible to do that. I just kind of balanced the two bolts in the unthreaded holes and lifted, with one hand, the clamp body and the 2 bolts and finessed the one bolt in the threads and then the other bolt.

Again, I could be wrong but I seem to remember doing that. That was also with the heat shield removed. Or I did it without removing the heat shield and then looked at it and told myself how dumb I was for not removing heat shield first. I have done 2-3 of the d/s rear clamps, including mine.
 

FW_Z71Burb

Well-Known Member
Joined
Oct 14, 2025
Messages
219
Reaction score
637
Location
Fort Worth, TX
I cannot remember for sure but IIRC, when you lift the d/s rear clamp body up to start one of the two rear bolts that attach the clamp at the back of head, I had both bolts shoved thru the unthreaded holes and started the top most bolt because the room to just start one and then try to snake the other bolt into the other hole, was so tight that it was near impossible to do that. I just kind of balanced the two bolts in the unthreaded holes and lifted, with one hand, the clamp body and the 2 bolts and finessed the one bolt in the threads and then the other bolt.

Again, I could be wrong but I seem to remember doing that. That was also with the heat shield removed. Or I did it without removing the heat shield and then looked at it and told myself how dumb I was for not removing heat shield first. I have done 2-3 of the d/s rear clamps, including mine.


I was thinking the same, starting with the top bolt. I’ll look into removing the heat shield too nice call
 

ORVietVet

Well-Known Member
Navy Supporting Member
Joined
Dec 31, 2023
Messages
2,761
Reaction score
5,062
Location
Oregon
I was thinking the same, starting with the top bolt. I’ll look into removing the heat shield too nice call
Guarantee you, remove that heat shield and drop the front of the front driveshaft and the work is way easier. Be aware, when you tighten the side bolt, to put pressure on the manifold flange, you do not have to hammer on it. Do it by hand with a ratchet or even snug down with a ratchet and then hand wrench it to make sure you "feel" the tension.
 

FW_Z71Burb

Well-Known Member
Joined
Oct 14, 2025
Messages
219
Reaction score
637
Location
Fort Worth, TX
Alright, now that I’m polishing the wheels ain’t no way I’m painting them black!

Also hitting the plastic trim tonight with restoration. Rear quarter restored for comparison to bumper

The wife might never wanna give it back to me now

IMG_0431.jpeg

IMG_0435.jpeg
 

FW_Z71Burb

Well-Known Member
Joined
Oct 14, 2025
Messages
219
Reaction score
637
Location
Fort Worth, TX
Also I picked up the exhaust manifold clamp kit from O’Reilly and felt around back there tonight. There’s no heat shield - I guess that came in later model years?

It will suck but pretty sure I can get it installed, might need the wife to help underneath the burb spotting bolts
 

Latest posts

Members online

No members online now.
Top