Serving 4L60e’s for dinner

KaulinGraves

Active Member
Joined
Jun 21, 2026
Messages
43
Reaction score
71
Location
River Valley Arkansas
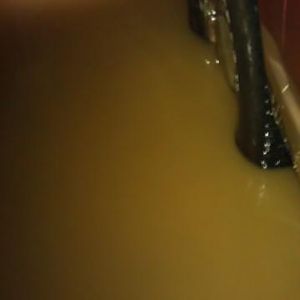
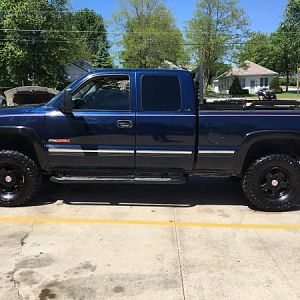
Hey all, I pulled this trans from an ‘07 Classic 4.8L 2WD from a salvage yard and intend to rebuild it for my ‘00 4.8L 2WD. I’ve done what research I can do to find and make sure this would at least be a good “core” for a rebuild trans. I can tell somebody has been in it before as the pins don’t correlate with the correct year of the truck, but the stamped code is for an ‘07 on the casing. If I remember correctly, the green 13-pin male end is until ‘03 or ‘04 as they had an internal speed sensor which changed to a white 15-pin. Even the female end is a 13-pin. Either way I have a rebuild kit that includes a 13-pin harness that I’m going to already replace it with. Right now, I just transferred the trans from my truck bed, to my kitchen floor XD. Let’s hope the Mrs. doesn’t notice. Wish me luck in the process.

If I said something incorrect, please let me know, I’ll take all the information or criticism I can get to make sure this goes as smoothly as possible for a first-time trans rebuild. Thanks
 

Attachments

  • IMG_4873.jpeg
    IMG_4873.jpeg
    381.8 KB · Views: 3
  • IMG_4604.jpeg
    IMG_4604.jpeg
    382.4 KB · Views: 4
  • IMG_4598.jpeg
    IMG_4598.jpeg
    316.6 KB · Views: 3
  • IMG_4593.jpeg
    IMG_4593.jpeg
    344.6 KB · Views: 2
  • IMG_4606.jpeg
    IMG_4606.jpeg
    315.7 KB · Views: 3

stutaeng

Well-Known Member
Joined
Feb 9, 2022
Messages
1,097
Reaction score
2,737
Location
Dallas, TX
Ideally, you want a unit that's never been apart as your first build. But you gotta do what you gotta do.

Did you get the manual? May be a good idea to print it and have it handy.

I think I mentioned somewhere on this forum before, but you need to have 3 areas generously sized: the case on a stand you can rotate (I welded a copycat gizmo to mount to my engine stand), an area for all the sub-assemblies (a 6 ft foldable table works well for this) and a dedicated cleaning area (parts washer is nice, but I've used a 5 gallon pail with paint thinner with some brushes.)

Familiarizing yourself with all the sub assemblies is what you should do first. Try learning the correct names. Clean parts twice before taking a good at things with good lighting. If you need to, get a magnifying glass or take things outside to look under natural light before calling something good or condemning it.

Practice reinstalling the subassemblies back into the case. This will give you practice and confidence and help develop how drums sounds/feel when they are fully seated, for example.

Good luck and may the Force be with you!
 

KaulinGraves

Active Member
Joined
Jun 21, 2026
Messages
43
Reaction score
71
Location
River Valley Arkansas
Ideally, you want a unit that's never been apart as your first build. But you gotta do what you gotta do.

Did you get the manual? May be a good idea to print it and have it handy.

I think I mentioned somewhere on this forum before, but you need to have 3 areas generously sized: the case on a stand you can rotate (I welded a copycat gizmo to mount to my engine stand), an area for all the sub-assemblies (a 6 ft foldable table works well for this) and a dedicated cleaning area (parts washer is nice, but I've used a 5 gallon pail with paint thinner with some brushes.)

Familiarizing yourself with all the sub assemblies is what you should do first. Try learning the correct names. Clean parts twice before taking a good at things with good lighting. If you need to, get a magnifying glass or take things outside to look under natural light before calling something good or condemning it.

Practice reinstalling the subassemblies back into the case. This will give you practice and confidence and help develop how drums sounds/feel when they are fully seated, for example.

Good luck and may the Force be with you!
I’m probably gonna have to be working off the back of my truck bed under a tin roof in the yard honestly, unless I rented a storage unit to work on it. I’m willing to take my time to do it right the first time. I’ve found several guides online and even have the steps written down and typed down(that I plan on printing off) to disassemble, reassemble, what to check, and what tools I need for each step. The only thing I haven’t bought yet is a torque converter and trans cooler(I don’t mind buying the latter at a later point in time, either way the truck drives in every gear except 3/4). I have a scribd.com link to a 4l60e manual here:


I’ve looked to find others but most of them seem to be this one. If there’s another you suggest, I’ll take a gander at that one too.

PS: At my current state of accessibility, I don’t have an unopened core to work with, even the one in the truck. Either way I’m going in blind with not much more than a “road map”, a torx plus bit, and a pair of snap ring pliers XD
 

KaulinGraves

Active Member
Joined
Jun 21, 2026
Messages
43
Reaction score
71
Location
River Valley Arkansas
Thank you so much. I got my info from this forum thread:


k5ride

New Member
Joined
Mar 12, 2023
Messages
3
Reaction score
6
Location
Apple Valley, CA
I have the 4l65e in my early 06 and I heard mid year they changed to the 4l70e. These are supposed to be much stronger and heavier duty. The modifications needed to update your 60 to a 65 or 70 are supposed to be simple. You may want to look into it.
 

KaulinGraves

Active Member
Joined
Jun 21, 2026
Messages
43
Reaction score
71
Location
River Valley Arkansas
Hey all, I pulled this trans from an ‘07 Classic 4.8L 2WD from a salvage yard and intend to rebuild it for my ‘00 4.8L 2WD. I’ve done what research I can do to find and make sure this would at least be a good “core” for a rebuild trans. I can tell somebody has been in it before as the pins don’t correlate with the correct year of the truck, but the stamped code is for an ‘07 on the casing. If I remember correctly, the green 13-pin male end is until ‘03 or ‘04 as they had an internal speed sensor which changed to a white 15-pin. Even the female end is a 13-pin. Either way I have a rebuild kit that includes a 13-pin harness that I’m going to already replace it with. Right now, I just transferred the trans from my truck bed, to my kitchen floor XD. Let’s hope the Mrs. doesn’t notice. Wish me luck in the process.

If I said something incorrect, please let me know, I’ll take all the information or criticism I can get to make sure this goes as smoothly as possible for a first-time trans rebuild. Thanks
Update on the teardown:

After getting the stripped bell housing to case bolt out, I’ve finally gotten it completely torn apart other than a couple things(light work). I was able to get the spring cage closest to the rear of the vehicle out(sits against the reaction internal gear) with an old c-clamp up through the center of the case and just work it out with a curved pick tool. I know there is a specialized tool to compress’s the cage fully, but I didn’t want to spend $50 to use it for basically one rebuild. Everything went well. I think on one gear I saw it was a bit blue in color(may have gotten too hot), and the low/reverse planetary gear assembly has one singular gear with a little wobble to it. I’ll post more pictures, but I’m not seeing or feeling any deep scratches. I think I lucked out for $250 and 2 days of work to pull this out of the truck. There was almost nothing in this pan but the magnet had PLENTY on it. I’m thinking whoever was in here last didn’t notice the single gear wobbling and threw it back together. It actually has a new reverse band with plenty of material left on it.
 

Attachments

  • IMG_5055.jpeg
    IMG_5055.jpeg
    199.4 KB · Views: 1
  • IMG_5054.jpeg
    IMG_5054.jpeg
    230.7 KB · Views: 1
  • IMG_5053.jpeg
    IMG_5053.jpeg
    297.4 KB · Views: 1
  • IMG_5052.jpeg
    IMG_5052.jpeg
    416.1 KB · Views: 1
  • IMG_5049.jpeg
    IMG_5049.jpeg
    343.8 KB · Views: 1
  • IMG_5044.jpeg
    IMG_5044.jpeg
    442.4 KB · Views: 1
  • IMG_5047.jpeg
    IMG_5047.jpeg
    386.5 KB · Views: 1

stutaeng

Well-Known Member
Joined
Feb 9, 2022
Messages
1,097
Reaction score
2,737
Location
Dallas, TX
Yes, I've also bought small and hard to find miscellaneous parts from WIT. You may have to create an "account," or at least the last time I did to get better pricing. Looks like the only in Arkansas is in Texarkana (?), so probably too far to drive. But you should be able to order online.

Another good source for transmission parts is, surprisingly, Rockauto. They have GM Genuine, AC Delco and other brands. Reasonable prices too, and don't forget to use the discount code :)
 

KaulinGraves

Active Member
Joined
Jun 21, 2026
Messages
43
Reaction score
71
Location
River Valley Arkansas
Yes, I've also bought small and hard to find miscellaneous parts from WIT. You may have to create an "account," or at least the last time I did to get better pricing. Looks like the only in Arkansas is in Texarkana (?), so probably too far to drive. But you should be able to order online.

Another good source for transmission parts is, surprisingly, Rockauto. They have GM Genuine, AC Delco and other brands. Reasonable prices too, and don't forget to use the discount code :)
I think the closest is in Oklahoma City(about 1.5 hour drive by interstate) but I’m not sure. Right now I’m looking to the reaction carrier/planetary gear as one of those singular pinion gears did wobble lightly side to side and when spun by itself does make a bit of noise compared to the other three. Just getting an idea of a price. From what I can find online in other forums, the 4-pinion is either equal-to or better than the later 5-pinion found in the 4L65E’s as the way the part was made is stronger and has larger openings for trans fluid to get around the pinions. One thing that gets me hung up is the fact that you can get one with or without an “oil slinger”. From what I can find, the oil slinger helps with trying to get fluid on every part, more evenly. Any thoughts on this?
 

stutaeng

Well-Known Member
Joined
Feb 9, 2022
Messages
1,097
Reaction score
2,737
Location
Dallas, TX
I think the closest is in Oklahoma City(about 1.5 hour drive by interstate) but I’m not sure. Right now I’m looking to the reaction carrier/planetary gear as one of those singular pinion gears did wobble lightly side to side and when spun by itself does make a bit of noise compared to the other three. Just getting an idea of a price. From what I can find online in other forums, the 4-pinion is either equal-to or better than the later 5-pinion found in the 4L65E’s as the way the part was made is stronger and has larger openings for trans fluid to get around the pinions. One thing that gets me hung up is the fact that you can get one with or without an “oil slinger”. From what I can find, the oil slinger helps with trying to get fluid on every part, more evenly. Any thoughts on this?
Yes, that's the general consensus on the 5 planet vs 4 planet gearset. GM added another planet, but they didn't tell us they also changed the metallurgy to a lower quality casting. So if yours is fine, just leave it alone. The ATSG manual should have specs on what the tolerances should be. It's just inserting feeler gauges to measure vertical planet endplay. Make sure that's done.

I'm not familiar with the oil slinger on these, maybe @Tonimus can chime in if he knows? I'm not sure if I mentioned on your other thread Nicktransmission in Las Vegas? He's not a member here, but he's on the tahoeyukonforum.com I believe you can email him technical questions? Or his Facebook page maybe?
 

KaulinGraves

Active Member
Joined
Jun 21, 2026
Messages
43
Reaction score
71
Location
River Valley Arkansas
Yes, that's the general consensus on the 5 planet vs 4 planet gearset. GM added another planet, but they didn't tell us they also changed the metallurgy to a lower quality casting. So if yours is fine, just leave it alone. The ATSG manual should have specs on what the tolerances should be. It's just inserting feeler gauges to measure vertical planet endplay. Make sure that's done.

I'm not familiar with the oil slinger on these, maybe @Tonimus can chime in if he knows? I'm not sure if I mentioned on your other thread Nicktransmission in Las Vegas? He's not a member here, but he's on the tahoeyukonforum.com I believe you can email him technical questions? Or his Facebook page maybe?
I’ll see if I can get on that forum and maybe get in contact with him. I’ll also do some deep diving on the manual and see what I can find. Thank you for confirming that information :)
 

KaulinGraves

Active Member
Joined
Jun 21, 2026
Messages
43
Reaction score
71
Location
River Valley Arkansas
I’ll see if I can get on that forum and maybe get in contact with him. I’ll also do some deep diving on the manual and see what I can find. Thank you for confirming that information :)
I think I found it. The proper end gear play should be between .008” and .024” between the “main body” of the assembly and the individual pinion gears
 

KaulinGraves

Active Member
Joined
Jun 21, 2026
Messages
43
Reaction score
71
Location
River Valley Arkansas
Update on the teardown:

After getting the stripped bell housing to case bolt out, I’ve finally gotten it completely torn apart other than a couple things(light work). I was able to get the spring cage closest to the rear of the vehicle out(sits against the reaction internal gear) with an old c-clamp up through the center of the case and just work it out with a curved pick tool. I know there is a specialized tool to compress’s the cage fully, but I didn’t want to spend $50 to use it for basically one rebuild. Everything went well. I think on one gear I saw it was a bit blue in color(may have gotten too hot), and the low/reverse planetary gear assembly has one singular gear with a little wobble to it. I’ll post more pictures, but I’m not seeing or feeling any deep scratches. I think I lucked out for $250 and 2 days of work to pull this out of the truck. There was almost nothing in this pan but the magnet had PLENTY on it. I’m thinking whoever was in here last didn’t notice the single gear wobbling and threw it back together. It actually has a new reverse band with plenty of material left on it.
Update on the “blue gear”:

It is the rear or output side of the internal reaction shaft. Also was looking at the pinions on the planetary, only one has sound when you spin it. It just so happens that it’s the only one with play as well(twisting diagonally). It isn’t much but I am going to get a feeler gauge soon to check it. Might just go with a full assembly at this point as I don’t know if it would be wise to put it back in
 

Attachments

  • IMG_5083.jpeg
    IMG_5083.jpeg
    341.3 KB · Views: 3

KaulinGraves

Active Member
Joined
Jun 21, 2026
Messages
43
Reaction score
71
Location
River Valley Arkansas
Update on the teardown:

After getting the stripped bell housing to case bolt out, I’ve finally gotten it completely torn apart other than a couple things(light work). I was able to get the spring cage closest to the rear of the vehicle out(sits against the reaction internal gear) with an old c-clamp up through the center of the case and just work it out with a curved pick tool. I know there is a specialized tool to compress’s the cage fully, but I didn’t want to spend $50 to use it for basically one rebuild. Everything went well. I think on one gear I saw it was a bit blue in color(may have gotten too hot), and the low/reverse planetary gear assembly has one singular gear with a little wobble to it. I’ll post more pictures, but I’m not seeing or feeling any deep scratches. I think I lucked out for $250 and 2 days of work to pull this out of the truck. There was almost nothing in this pan but the magnet had PLENTY on it. I’m thinking whoever was in here last didn’t notice the single gear wobbling and threw it back together. It actually has a new reverse band with plenty of material left on it.
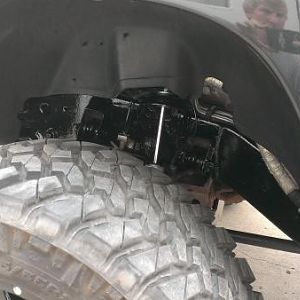
Finally finished the teardown. Only shadow scrapes on the pump internals, no grooves as far as the eye can see. I think we are in the clear boys. Now it’s just cleaning and reassembly. Also, I think I found the cause of all the fine shavings on the magnet. This bushing is ground wayyy down. Isn’t it supposed to be a copper color? lol
 

Attachments

  • IMG_5182.jpeg
    IMG_5182.jpeg
    383.2 KB · Views: 5
  • IMG_5181.jpeg
    IMG_5181.jpeg
    306.7 KB · Views: 6
  • IMG_5180.jpeg
    IMG_5180.jpeg
    363.5 KB · Views: 5
  • IMG_5177.jpeg
    IMG_5177.jpeg
    343.5 KB · Views: 6

KaulinGraves

Active Member
Joined
Jun 21, 2026
Messages
43
Reaction score
71
Location
River Valley Arkansas
Finally finished the teardown. Only shadow scrapes on the pump internals, no grooves as far as the eye can see. I think we are in the clear boys. Now it’s just cleaning and reassembly. Also, I think I found the cause of all the fine shavings on the magnet. This bushing is ground wayyy down. Isn’t it supposed to be a copper color? lol
We got new steel braided nylon lines for the trans lines. Got 6x new 90° -6AN fittings as well with the female ends already crimped on thanks to Custom Equipement Company in Fort Smith. It was the only place that would work with me and they helped me figure out exactly what I needed. I got 6’ going from trans to radiator, 1.5’ from radiator to cooler, and 7.5’ from cooler to trans. Also on the 1.5’ section, I had him crimp a 90° on one end so I could go around the frame/support on the passenger side with another 90° on that instead of going under. Worst case scenario I buy a small section to extend any of them a bit farther. They look great though :)
 

Attachments

  • IMG_5223.jpeg
    IMG_5223.jpeg
    232.9 KB · Views: 2
  • IMG_5224.jpeg
    IMG_5224.jpeg
    519.5 KB · Views: 2

stutaeng

Well-Known Member
Joined
Feb 9, 2022
Messages
1,097
Reaction score
2,737
Location
Dallas, TX
Finally finished the teardown. Only shadow scrapes on the pump internals, no grooves as far as the eye can see. I think we are in the clear boys. Now it’s just cleaning and reassembly. Also, I think I found the cause of all the fine shavings on the magnet. This bushing is ground wayyy down. Isn’t it supposed to be a copper color? lol
Is that the output shaft case bushing? Does Sonnax make an improved version? Or is there a way "rollerize" the output shaft?

On all my 4L80e builds I use the Sonnax "no walk" case bushing. It's got a lip and is wider than the factory bushing. I've never personally had one spin, but read it can happen.
 

Turbo4whl

Active Member
Joined
Feb 9, 2022
Messages
40
Reaction score
79
Location
Southeast Pennsylvania
Finally finished the teardown. Only shadow scrapes on the pump internals, no grooves as far as the eye can see. I think we are in the clear boys. Now it’s just cleaning and reassembly. Also, I think I found the cause of all the fine shavings on the magnet. This bushing is ground wayyy down. Isn’t it supposed to be a copper color? lol
Also make sure the trans case isn't all tore up where the steels ride. High torque engine tends to destroy where they ride .
 

Latest posts

Members online

No members online now.
Top