You are using an out of date browser. It may not display this or other websites correctly.
You should upgrade or use an alternative browser.
You should upgrade or use an alternative browser.
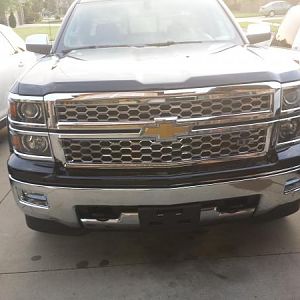
2004 RCSB 4x4 - The Mail Truck
- Thread starter INW-Iron-Steel
- Start date
INW-Iron-Steel
Well-Known Member
Definitely! interestingly, I had never heard the infamous "clunk" on my own personal truck until I used the aftermarket yoke. But, I have heard and fixed it on other trucks. When I slapped the driveshaft in I greased the lip of the seal, the splines of the yoke and the splines of the output shaft, as well as the outer diameter of the yoke itself.That slip yoke is where the infamous "clunk noise underneath" comes from when shifting. Grease now and then may not ever hear it.
INW-Iron-Steel
Well-Known Member
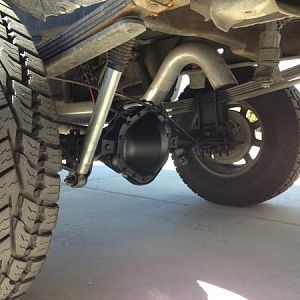
Truck is all back together and functioning much better! Only mistake (If you even consider it that) is I installed the rear u-joint in a position where I cannot access the grease zerk. I have the same issue with the conversion joints in the 93, so I flipped the orientation on the rear one on this install. The pinion yoke must be bigger than the stock 9.5 1350 yoke, because I cannot get my grease gun on the Zerk... Darn. I'll probably replace that u-joint when I get to putting the airbags in this truck in the next few months.
Also, friendly reminder that GM 8.5 rear ends can use different bolts than the 8.6 and 9.5. I robbed this cover off of the 8.5 I pulled out of the Suburban. I got both vehicles undercoated when we got here and that thick oily goop is a mess to deal with. I hardly enjoy working under either rig now, but I guess if it prevents them from rusting that's an alright tradeoff. Anyway, I didn't feel like fighting the goop on the diff cover, so I grabbed the one off the 8.5. I went to use the clean hardware too, but then I realized the threads were different in the 8.6 (M8 vs 5/16). I am thankful of past me, who bought the whole GM cover and bolt kit for the junkyard 9.5, AND saved the hardware I took off. I had to scrounge through the bolt-bins a bit, but I eventually found them. Saved me a trip to the hardware store, and these are OEM bolts. Here's a picture of the cleanup.

And the redone driveshaft ready to go in. I'm really missing my shop-press back home, but a hammer and some sockets got the job done.

Now if things could just stay fixed for a while that would be great!
Also, friendly reminder that GM 8.5 rear ends can use different bolts than the 8.6 and 9.5. I robbed this cover off of the 8.5 I pulled out of the Suburban. I got both vehicles undercoated when we got here and that thick oily goop is a mess to deal with. I hardly enjoy working under either rig now, but I guess if it prevents them from rusting that's an alright tradeoff. Anyway, I didn't feel like fighting the goop on the diff cover, so I grabbed the one off the 8.5. I went to use the clean hardware too, but then I realized the threads were different in the 8.6 (M8 vs 5/16). I am thankful of past me, who bought the whole GM cover and bolt kit for the junkyard 9.5, AND saved the hardware I took off. I had to scrounge through the bolt-bins a bit, but I eventually found them. Saved me a trip to the hardware store, and these are OEM bolts. Here's a picture of the cleanup.
And the redone driveshaft ready to go in. I'm really missing my shop-press back home, but a hammer and some sockets got the job done.
Now if things could just stay fixed for a while that would be great!
I learned a long time ago to keep small zip lock bags around and if I had bolts/nuts/washers, old or new, put them in the bags and label them and finding them again later was way easier. I do the same thing when I disassemble larger jobs. I then stack them in the order I took them apart and reverse when reassembling.
INW-Iron-Steel
Well-Known Member
I'm decent about labeling parts about 50% of the time. If I know what they're for the chance they get labeled goes up. Otherwise, they often get tossed in the 5-gallon bucket I call the bin of randomness. It is absolutely full of random ****, and I think people toss more things in there to mess with me (I found some fake fishing worms in there...definitely not my doing LOL). But, I like the idea of labeling plastic bags and stacking them on top of each other on big jobs. I may need to steal that. I tend to set bolts back in their place on big jobs. Ex- if I take off an intake manifold, I set the bolts back in the intake where they go, and then set the intake off to the side in a safe place. Same deal for a water pump if I am working on the front cover, otherwise I tend to thread the bolts back where they go if they won't be in my way.I learned a long time ago to keep small zip lock bags around and if I had bolts/nuts/washers, old or new, put them in the bags and label them and finding them again later was way easier. I do the same thing when I disassemble larger jobs. I then stack them in the order I took them apart and reverse when reassembling.
Yea, if there are different length bolts but are the same size and I have enough room, I do the same thing by putting bolts in holes and set aside. I have a fold out table, in the garage, just for things like that.I'm decent about labeling parts about 50% of the time. If I know what they're for the chance they get labeled goes up. Otherwise, they often get tossed in the 5-gallon bucket I call the bin of randomness. It is absolutely full of random ****, and I think people toss more things in there to mess with me (I found some fake fishing worms in there...definitely not my doing LOL). But, I like the idea of labeling plastic bags and stacking them on top of each other on big jobs. I may need to steal that. I tend to set bolts back in their place on big jobs. Ex- if I take off an intake manifold, I set the bolts back in the intake where they go, and then set the intake off to the side in a safe place. Same deal for a water pump if I am working on the front cover, otherwise I tend to thread the bolts back where they go if they won't be in my way.
someotherguy
Well-Known Member
If there's a bunch of varied fasteners and order of operations - this part on top of that part, blah blah.. I'll take lots of pictures beforehand, and have the laptop nearby to view while re-assembling. This was on the intake job for my '94 5.7..I'm decent about labeling parts about 50% of the time. If I know what they're for the chance they get labeled goes up. Otherwise, they often get tossed in the 5-gallon bucket I call the bin of randomness. It is absolutely full of random ****, and I think people toss more things in there to mess with me (I found some fake fishing worms in there...definitely not my doing LOL). But, I like the idea of labeling plastic bags and stacking them on top of each other on big jobs. I may need to steal that. I tend to set bolts back in their place on big jobs. Ex- if I take off an intake manifold, I set the bolts back in the intake where they go, and then set the intake off to the side in a safe place. Same deal for a water pump if I am working on the front cover, otherwise I tend to thread the bolts back where they go if they won't be in my way.

About the first half of these pics are prior and during disassembly, followed with cleanup, repair, reassembly. The full-size, close-up pics particularly showing the accessory drive support rod placement, and the various stud/bolt positions on the intake (esp since there's a couple different stud types based on what accessory bracket they retain) .. big time saver.

Richard
Yea, I forgot to say that. When I started in shops in 1978, we had no cell phones but in all fairness, the engine teardown was not nearly as cluttered as now. I do take a lot of pics too and some get posted here in my Garage thread.
someotherguy
Well-Known Member
Yep. I tried to cover all the bases with those - several of those pics are "quadrants" if you will of the top of the engine, so you can see how everything was arranged before harnesses and hoses got disconnected, and bolts removed.I forgot to say again, that most of the cell pics I take, for help with reassembly has to do with harness connectors and vacuum lines routing and connections.
Richard
INW-Iron-Steel
Well-Known Member
If there's a bunch of varied fasteners and order of operations - this part on top of that part, blah blah.. I'll take lots of pictures beforehand, and have the laptop nearby to view while re-assembling. This was on the intake job for my '94 5.7..
View attachment 2316
About the first half of these pics are prior and during disassembly, followed with cleanup, repair, reassembly. The full-size, close-up pics particularly showing the accessory drive support rod placement, and the various stud/bolt positions on the intake (esp since there's a couple different stud types based on what accessory bracket they retain) .. big time saver.
View attachment 2317
Richard
Thank you guys for both adding these tips! So helpful in building this forum and giving guys the confidence to work on their own stuff! I am like both of you, I take so many pictures of disassembly. I typically focus on placement and routing of wires and vacuum lines, but I may start taking photos of bolt placement too! I'd bet almost half the photos on my phone are disassembly photos from working on stuffI forgot to say again, that most of the cell pics I take, for help with reassembly has to do with harness connectors and vacuum lines routing and connections.
INW-Iron-Steel
Well-Known Member
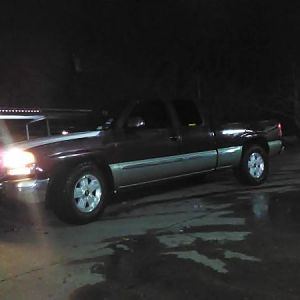
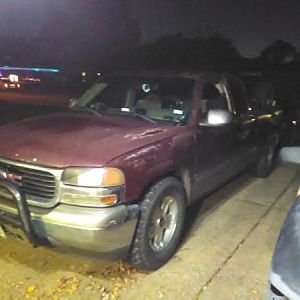
04 down, Suburban to the rescue! Battery was dead after sitting attached to the U-haul trailer overnight. Quick jump, no biggie, Just a money shot of both of our daily's.

INW-Iron-Steel
Well-Known Member
Trailer caused a large draw, and it is an issue with the trailer (I'd bet big money on that). Within the last few weeks I've had a couple other trailers hooked up overnight with no issues. Battery is less than a year old, replaced last summer. The previous Duralast (JC) went 8 years (dated 2016). Alternator is still putting out a solid 14v too! When I said dead, I meant DEAD! No dash lights, no ignition chime, no cab light... nothingTrailer caused a large draw? Old battery? Truck has a draw?
I actually just dropped the trailer off, needed it for a massive haul to the dump (I get one free trip to the dump here per year, so I made it count LOL). Anyway, I mentioned it to the guy at uhaul and he said, "oh yeah, I think that happened to one of our trucks here recently, maybe I need to remove it from service and take a look at it." No **** bud... I've got the very best of luck, as you can probably tell by now.
I guess we'll see how she starts tomorrow morning...
INW-Iron-Steel
Well-Known Member
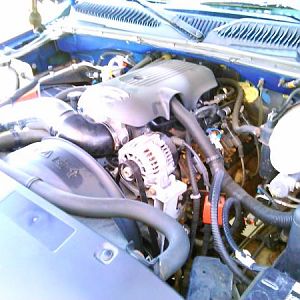
Latest update on the 04 involved finally getting the airbags installed. The controller and compressor had been sitting in a bin for at least 10 years, the bags are new. I installed the compressor where the second battery would be on a diesel.


INW-Iron-Steel
Well-Known Member
Checking for leaks with 50psi in the bags. Looking real goofy...

Doesn't look too bad unloaded with 5psi. I would prefer it to sit a little lower in the back, but you can't have everything. It sure beats bottoming out over every bump. I should have done this years ago.

Doesn't look too bad unloaded with 5psi. I would prefer it to sit a little lower in the back, but you can't have everything. It sure beats bottoming out over every bump. I should have done this years ago.
INW-Iron-Steel
Well-Known Member
The 93 is under the knife (or wrench?) so the 04 got thrust into forest service duty. With the day off and rainy weather, we decided to go visit some of Oregon's covered bridges. Our goal was to connect the more isolated ones via NF and/or BLM roads. The plan was going swimmingly until I came over a ridge toward the end of our journey and met a timber gate. I decided to walk up to the gate. When I turned around I realized we were above the clouds, and snapped this photo.

Unrelated, but here is a rainy day photo of my favorite bridge. Amazing engineering in these.

Unrelated, but here is a rainy day photo of my favorite bridge. Amazing engineering in these.
INW-Iron-Steel
Well-Known Member
Okay, I have recently been having some crazy thoughts about building an engine for this thing. I have thought for a long time that a 6.0 should be under the hood. Finding a low mileage, swap ready 6.0 is becoming hard. The ones that do exist are expensive. Enter the early long crank 6.0s. They seem to be plentiful and cheap with low miles.
I have a 4.8 with bad heads in storage (Original engine from this pickup). I am considering the idea of putting a 4.8 crank and rods in the 6.0 block with freshened up 317 heads. That combo would go in the 04. The long 6.0 crank supposedly works with older SBC transmission applications (th350/700r4/4l60) without a spacer. At this point I would have two 4.8/5.3 blocks, two sets of pistons, and a good set of 862 heads. With the 6.0 crank/rods this would effectively be a long crank 5.3 with flat top pistons. I could then put this in the Burb.
Is my thinking flawed? Someone tell me I am crazy because I am seriously close to pulling the trigger on an early low mile 6.0
Since I live in the Willamette Valley too, I have seen my fair share of covered bridges and yes, they are a sight to behold. I also love going to see the lighthouses. The Heceta Head Lighthouse is my favorite.The 93 is under the knife (or wrench?) so the 04 got thrust into forest service duty. With the day off and rainy weather, we decided to go visit some of Oregon's covered bridges. Our goal was to connect the more isolated ones via NF and/or BLM roads. The plan was going swimmingly until I came over a ridge toward the end of our journey and met a timber gate. I decided to walk up to the gate. When I turned around I realized we were above the clouds, and snapped this photo.
View attachment 5500
Unrelated, but here is a rainy day photo of my favorite bridge. Amazing engineering in these.
View attachment 5498

heceta head light - Bing
Intelligent search from Bing makes it easier to quickly find what you’re looking for and rewards you.
stutaeng
Well-Known Member
The 4.8 has a shorter stroke than the 5.3/5.7/6.0, or not sure I'm following you on that?Okay, I have recently been having some crazy thoughts about building an engine for this thing. I have thought for a long time that a 6.0 should be under the hood. Finding a low mileage, swap ready 6.0 is becoming hard. The ones that do exist are expensive. Enter the early long crank 6.0s. They seem to be plentiful and cheap with low miles.
I have a 4.8 with bad heads in storage (Original engine from this pickup). I am considering the idea of putting a 4.8 crank and rods in the 6.0 block with freshened up 317 heads. That combo would go in the 04. The long 6.0 crank supposedly works with older SBC transmission applications (th350/700r4/4l60) without a spacer. At this point I would have two 4.8/5.3 blocks, two sets of pistons, and a good set of 862 heads. With the 6.0 crank/rods this would effectively be a long crank 5.3 with flat top pistons. I could then put this in the Burb.
Is my thinking flawed? Someone tell me I am crazy because I am seriously close to pulling the trigger on an early low mile 6.0
Long crankshaft 6.0 would be perfect to pair with a 4L80e (4L80e swap your truck is what I'm saying here...) Why would want to use a TH350 or weaker 700R4 or first gen 4L60e? They sell custom torque converters to make that long crank work with your LS-based 4L60e.
Other options is to take your 4.8, swap to the factory crank/rods from a 5.3 and effectively convert it to a 5.3. Or crank/rods and bore it to 5.7 for an iron block LS1/LS6...Or do a combination and stroker aftermarket crank. 3.90 or 4.00" stroke. There are a lot of options out there.
Last edited:
Similar threads
- Replies
- 21
- Views
- 906
- Replies
- 3
- Views
- 499