They only listed for ext cab at RC and nothing for crew cab.~$200 they are listed as 99-06 Silverado ext cab.
the fronts weren't terrible. There's 2 nylon straps with buckles that run front to back under the seat. Then there's 2 elastic straps on each side with a plastic hook that I believe are supposed to run under the side and hook to each of those nylon straps but the clearance to get those under the side is kinda tight. I haven't done that yet. but it hasn't needed it yet. if I wasn't planning to pull the seats out in a few months to give the carpet a deep clean then id probably unbolt the two nuts from under the front of the bottom seat cushion and lift up the lower cushion/cover/etc and connect the elastic that way.
I've heard the rears can be done with the seat in place but it's far easier to remove the rear ext cab bench so you can get behind the rear seatback. I'll report back how that goes in the next few days.
You are using an out of date browser. It may not display this or other websites correctly.
You should upgrade or use an alternative browser.
You should upgrade or use an alternative browser.
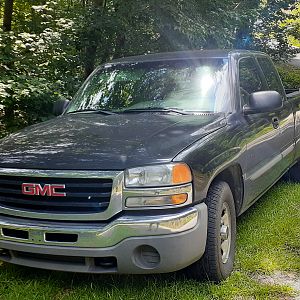
2000 Silverado z71 refurb
- Thread starter bigdogYJ
- Start date
Cadillacmak
Well-Known Member
We installed them in the 55 chevy. I love them, not to hard to install but a couple spots are a pain, cost us $150 for front only.how much of a PITA were they to install

someotherguy
Well-Known Member
The fleetside taillights changed in 2003 to this style, along with the change up front to the "cat eye" headlight setup.I never realized there were that many styles of tail lights on the GMT800's! I thought there were 2 types, the Chevy and the GMC, must be half a dozen.
View attachment 1810
Richard
bigdogYJ
Well-Known Member
Got my phone mount installed.
Panavise in dash metal bracket uses factory dash screws behind the beauty trim bezel. The magnetic charger mount used to be made by another company but looks like they got bought out by scosche.


Panavise in dash metal bracket uses factory dash screws behind the beauty trim bezel. The magnetic charger mount used to be made by another company but looks like they got bought out by scosche.
someotherguy
Well-Known Member
I need something like this for my 400's. There's just no sitting the phone on the seat and being able to quickly glance at Waze, which I use frequently as my trip takes varying paths depending on how stupid traffic is in given choke points along the way.Got my phone mount installed.
Panavise in dash metal bracket uses factory dash screws behind the beauty trim bezel. The magnetic charger mount used to be made by another company but looks like they got bought out by scosche.
View attachment 1822
View attachment 1823
Too bad my new phone doesn't have wireless charging. Still, it'd be good to have a nice mount that doesn't screw up my dash.
Richard
bigdogYJ
Well-Known Member
I need something like this for my 400's. There's just no sitting the phone on the seat and being able to quickly glance at Waze, which I use frequently as my trip takes varying paths depending on how stupid traffic is in given choke points along the way.
Too bad my new phone doesn't have wireless charging. Still, it'd be good to have a nice mount that doesn't screw up my dash.
Richard
at the top or bottom choose the mfg and it will list all parts they make for that mfg's models.
Some have multiple choices. but all have the basic amps mounting pattern to connect whatever you want. I've found their mounts to always be really solid without leaving holes visible on the dash.
bigdogYJ
Well-Known Member
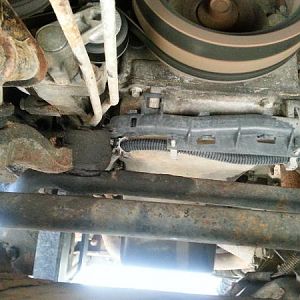
Well the rain today added something to my project list and may change my priorities. I was planning to look at the blower motor, controller and resistor but located a pretty decent water leak on the passenger side. It seems it’s coming from maybe the base of the windshield on the passenger side. Hard to locate precisely with the rain still falling today.
It seems the water leaking from the windshield area down the right side a pillar and behind the kick panel to the floor/door sill channel. My best guess at this point is the water leaking is hitting the blower motor or resistor and/or the connectors. So before I tear into that and replace parts I need to address the water leaking issue.
Probably be best to wait for the rain to hold out so I can pull some panels and try to locate the intrusion point by controller where the water comes from.
stutaeng
Well-Known Member
I noticed a few weeks ago my 99 had a damp driver's side floorboard. There's a little blank out panel on the passenger side under the cowl that I've read can leak (the AC box intake is under there.)
So I removed the cowl, which is very easy I found out. However, my blank out panel was well sealed. So I couldn't see down there and put it back together. My leak is on the opposite side, so IDK. The failing foam tape on the middle of my cowl is something I'll have to fix later, but I don't think that would contribute to anything because water already runs down there and sheds to the side?
Later I watched a video where a guy had a leak between that "gutter" that runs under the cowl and and the AC intake tube. He mentioned there was foam tape there that fell apart. He added caulking. Let me see if I can find that video.
Attachments
Like @stutaeng said, the cowling is an easy access. Well known area of leaks. You may open up and see where sealing is cracked. When is dry outside, stuff paper towels in a small likely leak area and concentrate a water source and see if the paper towels get wet.Well the rain today added something to my project list and may change my priorities. I was planning to look at the blower motor, controller and resistor but located a pretty decent water leak on the passenger side. It seems it’s coming from maybe the base of the windshield on the passenger side. Hard to locate precisely with the rain still falling today.
It seems the water leaking from the windshield area down the right side a pillar and behind the kick panel to the floor/door sill channel. My best guess at this point is the water leaking is hitting the blower motor or resistor and/or the connectors. So before I tear into that and replace parts I need to address the water leaking issue.
Probably be best to wait for the rain to hold out so I can pull some panels and try to locate the intrusion point by controller where the water comes from.
bigdogYJ
Well-Known Member
A break in the rain today means I get to figure out where the water leak is coming from…
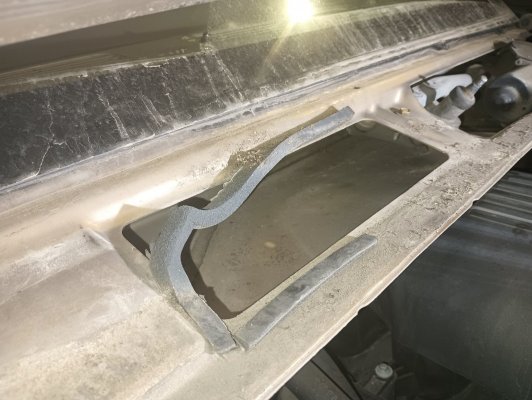
So I pulled the cowling cover off, aside from being extremely dirty which I cleaned up as best I could, the cover over the air inlet seems to be intact. I’ve seen others that were just a plastic cover clipped in place with a seal or gasket. Mine seems to be a metal cover that’s sealed with some kind of lap sealant and the integrity seal seems to be pretty good. The black drip seems to be the primer from when the windshield was last replaced ~15 years ago.

I cleaned up everything I could inside and outside of the cowl poured some water down inside the cowl opening didn’t get any water inside port a lot more still didn’t get any water inside. started pouring from the top of the cowl still didn’t get any water inside. Worked my way up the a pillar took the garnish off the side of the windshield Cleaned that up as best I could. Poured water down the a pillar still no water inside. Poured water from the top of the windshield on the passenger side let it run all the way to the edge all the way down the windshield to the cowl etc. still no water inside. Finally ended up pouring water above the top of the windshield on the driver side about over the steering wheel, instantly water started pouring inside. Bingo!

It was a pretty significant leak. The whole passenger door sill channel was filled and the carpet was soaking it up along that whole side.

Basically the water would drip behind the seal above the windshield on the driver side run across the top side of the headliner board to the passenger a pillar run behind the passenger a pillar trim down to the dashboard dripped down behind the dashboard and would basically drip into The blower motor area and it would drip out of there onto the floor and then down into the door sill.
Not sure if just good ole silicone bead across the top is worth trying, or start with a piece of clear tape across the whole top for now, or just get it done right and have it all resealed.

So I pulled the cowling cover off, aside from being extremely dirty which I cleaned up as best I could, the cover over the air inlet seems to be intact. I’ve seen others that were just a plastic cover clipped in place with a seal or gasket. Mine seems to be a metal cover that’s sealed with some kind of lap sealant and the integrity seal seems to be pretty good. The black drip seems to be the primer from when the windshield was last replaced ~15 years ago.
I cleaned up everything I could inside and outside of the cowl poured some water down inside the cowl opening didn’t get any water inside port a lot more still didn’t get any water inside. started pouring from the top of the cowl still didn’t get any water inside. Worked my way up the a pillar took the garnish off the side of the windshield Cleaned that up as best I could. Poured water down the a pillar still no water inside. Poured water from the top of the windshield on the passenger side let it run all the way to the edge all the way down the windshield to the cowl etc. still no water inside. Finally ended up pouring water above the top of the windshield on the driver side about over the steering wheel, instantly water started pouring inside. Bingo!
It was a pretty significant leak. The whole passenger door sill channel was filled and the carpet was soaking it up along that whole side.
Basically the water would drip behind the seal above the windshield on the driver side run across the top side of the headliner board to the passenger a pillar run behind the passenger a pillar trim down to the dashboard dripped down behind the dashboard and would basically drip into The blower motor area and it would drip out of there onto the floor and then down into the door sill.
Not sure if just good ole silicone bead across the top is worth trying, or start with a piece of clear tape across the whole top for now, or just get it done right and have it all resealed.
IMO, I would seal it with silicone and if that stops it, after letting it set up and dry a couple days, then you know a reseal of the w/s will likely fix the problem. Most w/s-glass companies will not guarantee that they can remove your w/s without breaking it.
bigdogYJ
Well-Known Member
Yeah that’s what I figured. I assume the outer black piece is just a beauty trim that can be pulled out and seal with silicone behind it? Or should I seal the trim piece to the body?IMO, I would seal it with silicone and if that stops it, after letting it set up and dry a couple days, then you know a reseal of the w/s will likely fix the problem. Most w/s-glass companies will not guarantee that they can remove your w/s without breaking it.
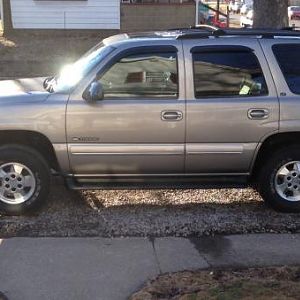
Trim piece to the body. My 2005 Tahoe has that done by the previous owner. Has never leaked a drop. Must have before I owned it. I live in Oregon, where it rains a lot. In the Willamette Valley.Yeah that’s what I figured. I assume the outer black piece is just a beauty trim that can be pulled out and seal with silicone behind it? Or should I seal the trim piece to the body?
bigdogYJ
Well-Known Member
I'll take a stab at it tomorrow after I get the surfaces cleaned up real good. hope to have some sun tomorrow.Trim piece to the body. My 2005 Tahoe has that done by the previous owner. Has never leaked a drop. Must have before I owned it. I live in Oregon, where it rains a lot. In the Willamette Valley.
This will take some time but I recommend letting it dry at least one day after cleaning and then cure 2 days after applying silicone. Plus, I think there is 2-3 kinds of silicone to use for something like this and use new silicone. Do not use old silicone. It has a shelf life.I'll take a stab at it tomorrow after I get the surfaces cleaned up real good. hope to have some sun tomorrow.
stutaeng
Well-Known Member
Great job finding that leak!
bigdogYJ
Well-Known Member
I cleaned it up real good. Letting it dry out for a day. Windshield urethane arrives tomorrow. I also called a couple local glass shops to see if they had any ideas or a way to reseal it without destroying the windshield. We'll see if they call me back before I tackle it tomorrow. Unfortunately gotta try and do it before next rain so it can cure and then I’m out of town for a few weeks so I’d like to take care of it before I head out. We’ll see…

bigdogYJ
Well-Known Member
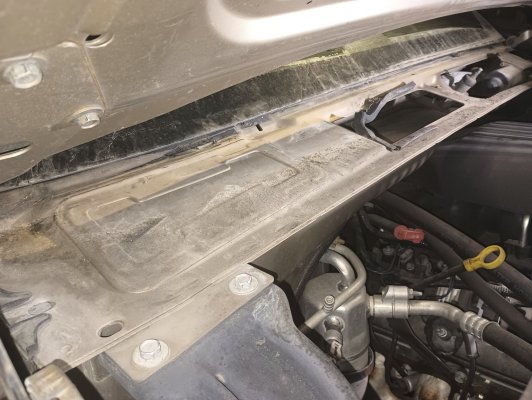
Decided to tear into the blower motor and see how bad it is. Started with the cabin filters. TBH I expected worse for last bring changed probably 20 years ago.

Fresh filters going in…

Fresh filters going in…
Those cabin air filters are terrible. They are nasty. If I was the blower motor, I would wait till you got back under there and reach out and slap you. Working that blower way too hard. That is like never ever changing a fuel filter. Crap, those are Boliver Shag Nasty!!!
Last edited:
Similar threads
- Replies
- 156
- Views
- 9K
- Replies
- 150
- Views
- 8K
- Replies
- 12
- Views
- 811
- Replies
- 2
- Views
- 3K